Pages

Showing posts with label Finger Paints. Show all posts

Tuesday, December 11, 2012

Winter Holiday Challenge: Festival of Lights

Quick post for the third and bright day of the Winter Holiday Challenge: Festival of Lights!


I chose to keep it simple, but colourful. One coat of Date in the Moonlight (Essence) composed the perfect dark night sky. The silver thread connecting all the lights was striped with Bring On The Snowflakes (Sephora by O.P.I.).
The colourful bulbs were dotted using several different polishes. Red (011), green (067), and orange (028) were Milano, that my grandma bought me in France. Blue was also Essence: Gleam In Blue. Yellow was a no name neon from Salomé on top of Amarelo Pop Art (Colorama). New Lilac (Pure Ice) was imposed chosen by my sister. Also upon her request were Bronze Sculpture (Finger Paints) and Morgan Le Fay (a england). The last touch of sparkly was Na Mira 3D (Impala).

I loved doing this mani. It was probably the quickest I've done in a long time, and it turned out so cute and cheerful! :-)


xoxo

PRIS


Tuesday, December 4, 2012

Three Challenges, Two Manis

Cheating last time wasn't enough. This time I had to combine three challenges! However, it's two completely different manicures... :-p

First up is #PolishDays #BLINGnails edition! The lady running it all forgave my cheating last time, let's see if she'll accept it this time around. Hopefully the many sources of 'bling' will make up for it! (To read a bit more about Polish Days, check my debut!)

Hannah (aka Polly Polish) asked us to "get our bling on!" inspired by her recent engagement (Congrats, btw!). I started to Gleam in Blue (Essence)! But even before even thinking about the sparkle, the first thing that came to mind was my white gold wedding band. Perfect chance to try on Ninja Polish's He Went to Jarred, a 12K white gold flake top coat.


Onto the next blingy source: jewelry! Most of the jewelry I own were gifts from my grandma. There's this white gold heart with a light blue centre that I love (have I mentioned blue is my favourite colour?).  The pendant was drawn in Bring On The Snowflakes (Sephora by O.P.I.) with a small brush.

Grandma recently gave me a (silver) bracelet full of pendants, among them an Eiffel Tower (Paris is her favourite place in the world). That transported me directly to the night hubby and I were admiring the sparkly tower. I reproduced it in Na Mira 3D (Impala) over Black Expressionism (Finger Paints), using a striper.


Enough bling!

Next up is the "Winter Holiday" Challenge - Snowflakes and Snowfall. It was represented above as a snow fall of white gold, and with the sOPI polish. Could there be a more appropriate name? ;-)

I'll redeem myself with the last up, which is also acceptable for the previous challenge: "Let It Snow!" Challenge - Snowflakes.

Base colour was Fire (Revlon) and I stamped the snowflakes from Bunny Nails Holiday edition plate HD05, using French White Tip (New York Color). It was the first time I was actually happy with a stamping attempt. Guess I'm finally getting the hang of it, although I'm still far from perfect!


Rounding up, I have a blingy mani (that ended up being sentimental as well), featuring a white gold flake snowfall, and a red wintery snowflake mani. How's that for kickstarting the challenges and the holiday season? :-D


Can't way to see the other ladies' manis in all three challenges!


xoxo

PRIS


Friday, November 30, 2012

Check your balls!

I know, I know, not all of us have balls. Even though my mom swears by mine, sometimes. :-p

This post is to end Movember. The men's health awareness month, when moustaches pop up in the least suspecting faces (including my husband's!) and become an interesting competition of who's the thickest, the fullest, with most body, etc.


Even though Movember focuses specifically on prostate cancer and mental health, my focus here is on testicular cancer. 


First, because it's the most common cancer in males between the age of 15 and 34. Volunteering at Planned Parenthood and working at a university, that's the age group I deal with on a daily basis, specially 18 to 25.

Second, because there's a self exam, equivalent to the strongly advertised self breast exam: touch your balls! Look for lumps, firm masses, nodules. Look for a doctor, if you're in doubt!

Third, because if found early, it's almost a 100% curable! This information came from DreamLoveCure, and you can find tons of websites by googling "touch your balls" or "testicular cancer". 

After a full month of an uneven and sparse pair of "Mo's" and beard ("cause if I'm growing something, I'll grow it all!" hubby said), he was finally about to get rid of it. It was time to celebrate!


And I needed my own Mo' for the photo shoot!


Base was Snow Me White (Sinful Colors) and mo's were Black Expressionism (Finger Paints). I used a dotting tool for the branded one, and a brush for my husband's.

So, are your checking your balls? Are your loved ones checking theirs? ;-)


xoxo

PRIS

Friday, November 2, 2012

"This Is Halloween" - Trick or Treat!

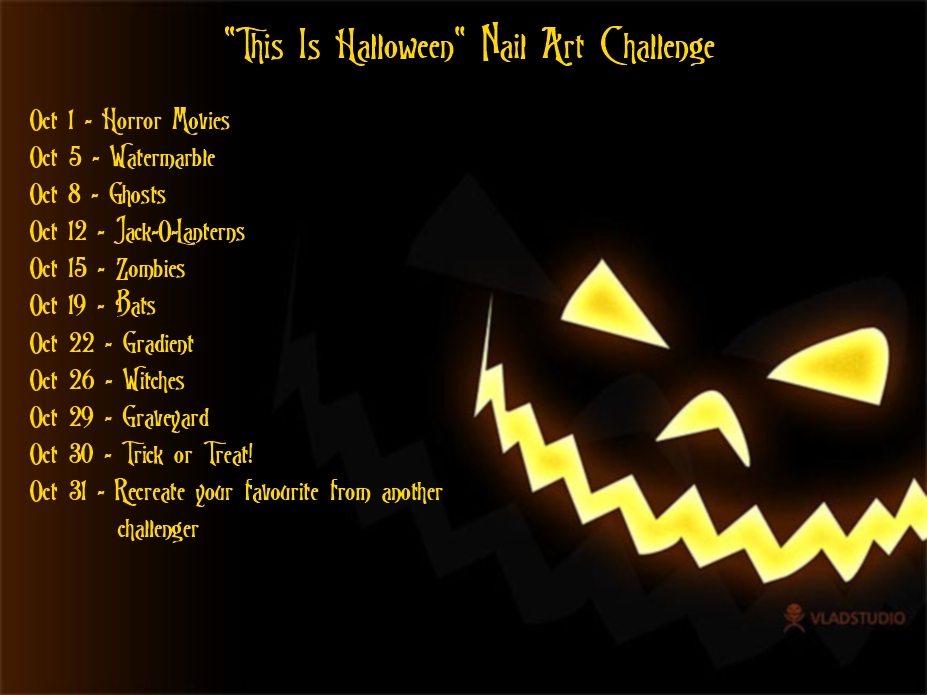
After a spooky and adventurous month of October, the "This is Halloween" Nail Art Challenge comes to an end. I'm proud of taking on this challenge and fulfilling it to (almost) completion! Got lots of praises for the crazy designs! :-)

I would like to thank Bec from Lacquer Dreams for coming up with the prompts and for keeping us all connected throughout the challenge. Well done!!

But wait, 'Trick or Treat!' is not the last day of the challenge! Yeah, I know. As noted before, I'm anal and will only publish on Tuesdays and Fridays. I'm already late enough with this prompt, it makes no sense posting Halloween stuff the second week of November. Plus, there's no better way of ending this challenge than with lots of sweets! ;-)

OK, enough babbling and onto the treats!


What a better way to start than with a blank canvas? Two coats of Pétala Branca (Colorama) prepped all my nails to the sugary work ahead! When I first started thinking about this challenge, two things came to mind: Candy Corn and Jawbreaker. But I didn't wanna do just that. I wanted to represent different Halloween candies, or even candies in general.

What do we give out when trick or treaters knock on our door? M&M's!! A dotting tool placed Orange (028 - Milano), Red (Sample Sale - Sephora by O.P.I.), Brown (Café - Colorama), Green (High Line Green - New York Color), Yellow (Lexington Yellow - NYC), and Blue (Water Street Blue - NYC) chocolate coated candies on my nail, and Snow Me White (Sinful Colors) branded them with their famous m! :-)

Taking it a step further, my all-time favourite M&M's are the Premium Mint Thrills. But they are quite hard to find, so I make do with the regular Mint ones, which are a bit easier to get my hands on, although they seem to be a limited edition. High Line Green (NYC) was once again used for the darker green, then mixed with Mint Dream (Pure Ice) for the lighter shade of green. Miss Minty (Gosh) mixed with Mint Dream (Pure Ice) achieved the minty candy coating.

One of Patty's favourite candies are Skittles, which used the same Orange, Red, Green, and Yellow polishes, plus a mix of Açaí and Eterno (both from Colorama) for the Purple candy. These were also branded with Snow Me White (Sinful Colors).


Another favourite candy of ours (both little sis', my mom's, and mine) is gum drops! For the white candy, I used Geada (Colorama) and mixed this polish with all other colours before dotting them to the nails. Purple candies were I Don't Bite (Sephora by O.P.I.) and the same Orange, Red, Yellow, and Green polishes were used. A coat of Morgan Le Fay (a england) was used over all gumdrops, giving that shimmery and sugary look.

Two coats of Jawbreaker (Pretty & Polished) conferred the perfect jawbreaker look on the thumb.

Sponging the Candy Corn was a nightmare!! I got the technique right on Patty, but after 4 failed attempts, I gave up and just free-handed a striped candy-corn-inspired nail. Polishes were the same Yellow and Orange as used before, and same White as the base colour.

As noted by the Mint M&M's, I LOVE anything minty! Therefore, my candy manicure couldn't miss starlight mints! I drew both red stripped and green stripped mints, using the same Red as before, and the same mixture of Green and Mint, with a higher percentage of mint this time around. Striped were made with a striping brush.

The Gummy Bear was inspired by those giant colourful ones, rather than the small one-coloured candies. I followed I Have a Cupcake's tutorial, using the same Orange, Red, Green, and Yellow polishes as before. We didn't have Gummy Bears growing up, so both my sister and I are making up for the lost time as adults! ;-)


Hubby couldn't be left out of this, could he? Although he's not a candy fan, one of his favourite candy bars are (frozen) Twix. He did ask me to draw a bitten Twix, showing the layers of chocolate, cookie, and caramel, but I didn't have a cookie or a caramel colour (see? I need more polish!! :-p). I recently received my old version of Holy Grail (a england) and the candy bar wrapping was the perfect opportunity to wear it! The chocolate itself was a bottom layer of Café (Colorama) as used before for the M&M's, topped by a layer of Cop an Attitude (Finger Paints), a magnetic polish. The magnet gave the wavy effect of the top of the candy bar. I was happy with the results!

This was probably the challenge I had the most fun with. Not only when doing the nails, but when taking the pictures, and eating the props!!


Thanks for joining me in this adventure! There might be another one soon, you never know! ;-)


xoxo

PRIS


PS: I know this is incredibly late, but I'm backdating the post to follow the original date it should've been posted. Remember, I'm anal! :-p


Tuesday, October 30, 2012

"This Is Halloween" - Graveyard

We're geting close to the end of the "This Is Halloween" Nail Art Challenge!

As I post twice a week (on Tuesdays and Fridays), my Monday entries have gone live on Tuesdays throughout this Challenge. This means that today's post should've been "Trick or Treat!" (which I'll publish on Friday), but I'm still on yesterday's prompt "Graveyard". (Yeah, I'm anal like that... :-p)


This theme has a bit of sentimental value (polish days?), even though some people may find it weird. Little sis likes cemeteries. Patty likes strolling along the tombstones, reading the inscriptions, admiring the crypts. During family vacations, we've joined her in this sightseeing more than once. It's definitely interesting!


OK, I know there's a difference between cemeteries and graveyards. But Patty likes them both the same, so I couldn't do tombstones on my nails without thinking of her! ;-)

Base colour is two coats of Date in the Moonlight (Essence). It could be a one coater, but I preferred dealing with thinner coats and doing it twice. This polish dries SO quickly!! There's a nice blue shimmer to it, but hubby couldn't see it at all and kept saying it was just a dark grey... 
We didn't do a good job in capturing that shimmer, but I found a great picture by Lola in the Nail Polish Forum, and an awesome post by Les Ongles de Chamallow.

The tombstones were Carbonite (Revlon), which is a great one-coater, and black details were with my go-to black, Black Expressionism (Finger Paints). The sparkly round silver moon was Bring on the Snowflakes (Sephora by O.P.I), and the grass growing over the tombstones was High Line Green (New York Colors). 


The grass-like look was achieved mixing two different shades of green flocking powder I bought in a 4-pack at Michaels. I'd already attempted plush nails before, and failed miserably, but I thought that trying it small could work better. And it did!! :-D


The sparkly glittery addition was Glitter Goblin (China Glaze). I loved the colours on this one, such a Halloweenie combination!!


Have you seen the spooky graveyards the other ladies in the challenge came up with?

xoxo

PRIS


Friday, October 19, 2012

"This Is Halloween" - Bats

The theme now is Bats, for the "This Is Halloween" Nail Art Challenge!

I didn't really think I could pull that off, so when I saw Halloween nail stickers at Dollarama, I picked up the package with the most little bats.

Then, ashamed of taking the easy way out, I started looking for tutorials online, and came across two good ones on youtube: Cute Bats from Dying 4 Chocolate and Spooky Bat Nails from Cute Polish.


Because it's Halloween, and I had just bought a new orange shade (and somewhat inspired by Cute Polish's design), the base colour was Gorgeous Bling Bling (Essence). One coat might've done it, but I ended up using two. For the bats, my usual suspects: Black Expressionism (Finger Paints) and Snow Me White (Sinful Colors). No nail art pen this time around, just dotting tools of mani different sizes.


I loved the cute little bats!! And I thought they were fairly easy to make, specially the Dying 4 Chocolate ones.

Are there gonna be more bats or batmans for this challenge? ;-)


xoxo

PRIS


Tuesday, October 16, 2012

"This Is Halloween" - Zombies

Onto the third week of the "This is Halloween" Nail Art Challenge, I wasn't that excited. Zombies are not my thing, and my mind was blank...

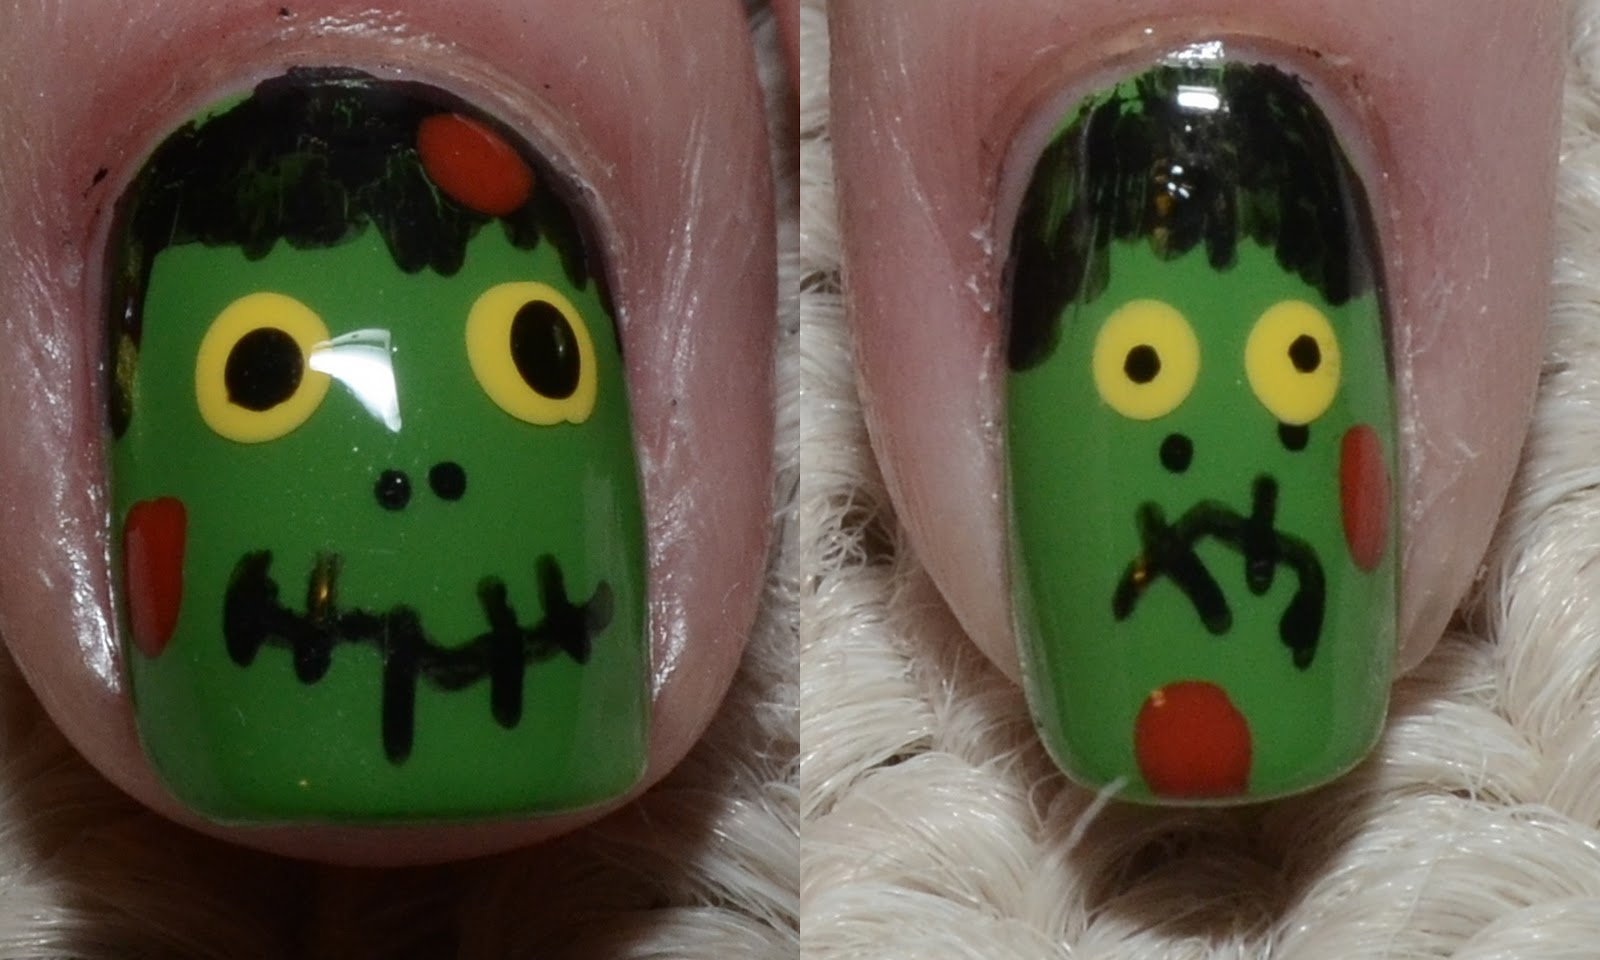
...suddenly, I had that lightbulb moment: Zombie Farm!! Hubby plays that on his iPhone, and I started looking for pictures to see if they were doable. Guess what? They were!!


Green was the base colour for my zombies. Not being a big fan of green, I thought it was the perfect opportunity to try all my light greens!

Right hand was from an Italian brand, Milano, that my grandma bought for me in Paris, earlier this year. It seems to be a drugstore brand, and it has no name, only a number: 067. Application was easy, no problem with clean up, and it was a one-coater!! Looks like a good stamping polish. I can envision some interesting Christmas designs! :-)


For the left hand, I used High Line Green (New York Colour) and on the non-zombie nails I topped it off with Ivy League (Sally Hansen), which I had already used for the St. Paddy's mani. 

Totally Cool Nails's Zombie Tutorial taught me how to draw the zombies. I followed the same technique for the Zombie Farm zombie on my thumb. Hubby didn't recognize it at first, but he was all proud when I showed the picture that inspired me... ;-)


Black details were either with Black Expressionism (Finger Paints) or Sally Hansen Nail Art Pen in Black. If you ever use the pen, careful with your skin. It stains and there's no polish remover that will get rid of it. It only goes away after a shower...  Roguish Red (China Glaze), Snow Me White (Sinful Colors), and Amarelo Pop Art (Colorama) were also used for the red, white, and yellow details.

As ugly as Zombies can be, it turned out to be a very cute design! :-)

What will we come up with next??


xoxo

PRIS


Friday, October 12, 2012

"This Is Halloween" - Jack-O-Lanterns

Another post, another day of our "This Is Halloween" Nail Art Challenge!

For Jack-O-Lanterns, no better way to start than with an orange polish, right? ;-)


To start, two easy coats of Fagulha (Colorama) - that translates from the Portuguese as Spark -, but I would've used a third had I worn it on its own. With a striping brush, I drew the darker lines using Roguish Red (China Glaze). Details in black - eyes, nose, mouth - were either with Black Expressionism (Finger Paints) and dotting tools of different sizes, or with Sally Hansen Nail Art Pen in Black (liked it better this time around).


The theme was Jack-O-LanternS, and that was the excuse I needed to play around with many different pumpkin faces!!


Can't wait to see what else the other ladies in this challenge are gonna come up with!


xoxo

PRIS